
Qbit editor overview
A tour of the canvas, element list, and style controls.
The Qbit editor is where you build the page a code opens. This tour covers the layout so everything else in this section makes sense.
Creating a page
- Go to Qbits and click Create a Qbit.
- Name it, add an optional description, and either Start from scratch or pick a template (the phone preview shows each one live).
- Leave Create QR Code checked to get a connected code automatically - the fastest path from idea to scannable.
- Click Create and you land in the editor.
The editor at a glance
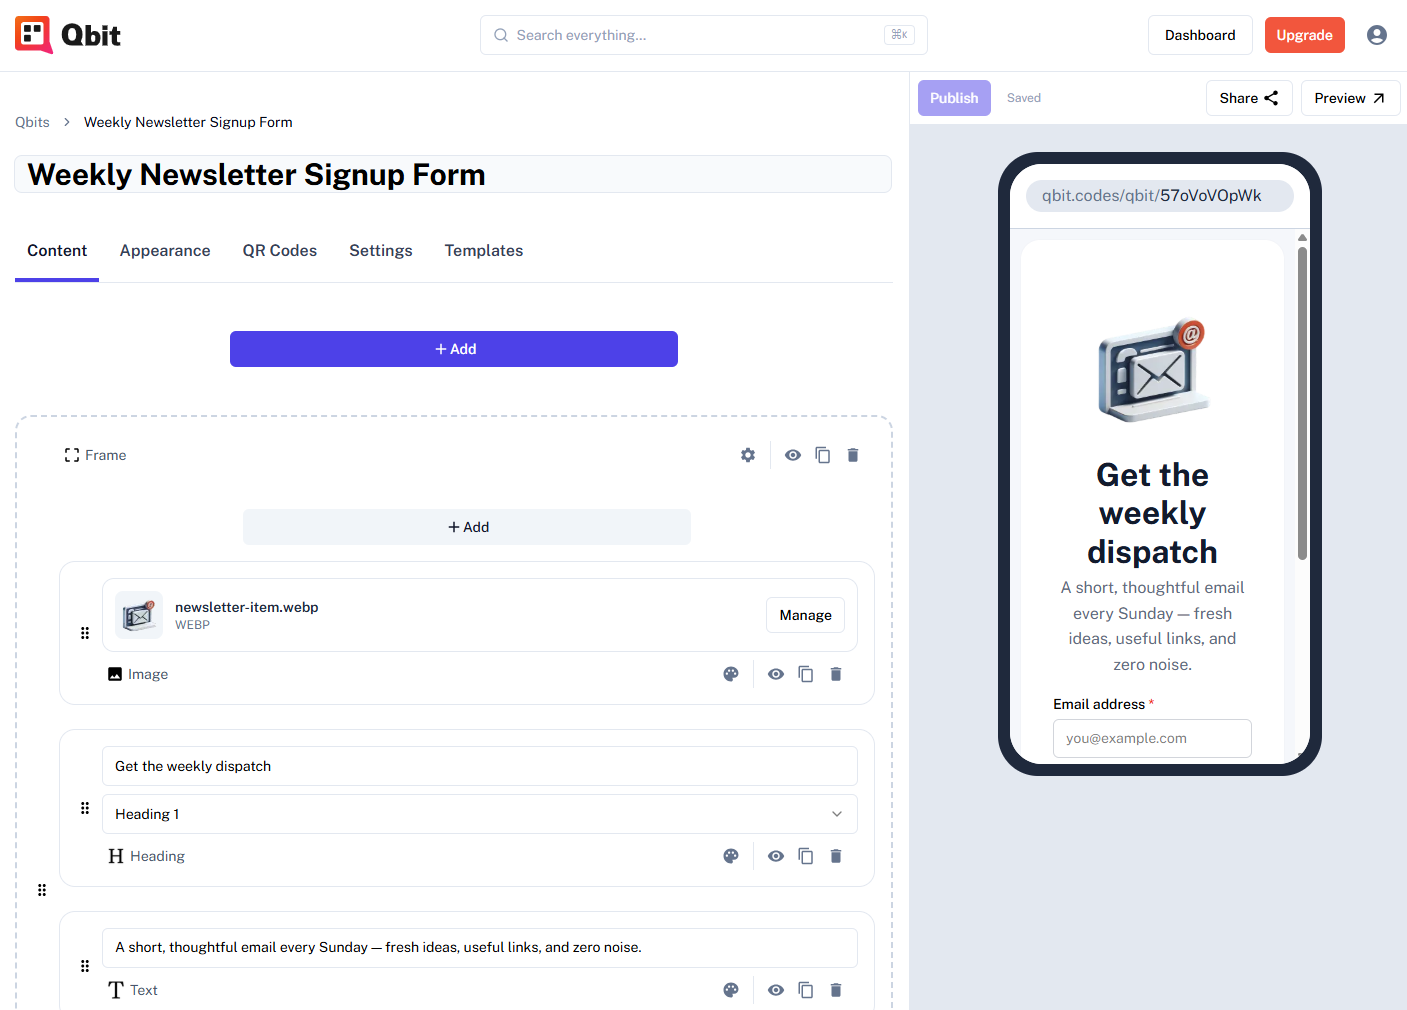
- Left: the canvas. Your page's elements as a stack of rows - add, edit, drag to reorder.
- Right: the live preview. A phone frame showing the page as visitors will see it, refreshed as you edit.
- Above the preview: the Publish button, a save indicator, Share, and Preview (opens the draft full-screen in a new tab).
The five tabs
- Content - the elements on your page. Where you'll spend most of your time. See Working with elements.
- Appearance - themes, colors, fonts, and swatches. See Styling and themes.
- QR Codes - the codes pointing at this page.
- Settings - the page URL, social preview, tags, copy, and delete.
- Templates - restart the page from a template (this replaces its content, so it asks you to confirm).
Two things to internalize early
- Everything autosaves. There's no save button - edits are stored a couple of seconds after you stop typing, and the save indicator confirms it.
- Saving isn't publishing. Your edits live in a draft until you click Publish - the live page never changes mid-edit. See Drafts, previewing, and publishing.
Still stuck? Email support@qbit.codes.