
Creating a digital menu
Build a menu with sections, items, and prices.
Build your menu once in Qbit, drop it on a page, and never reprint it again. Menus are included with Premium and Team plans.
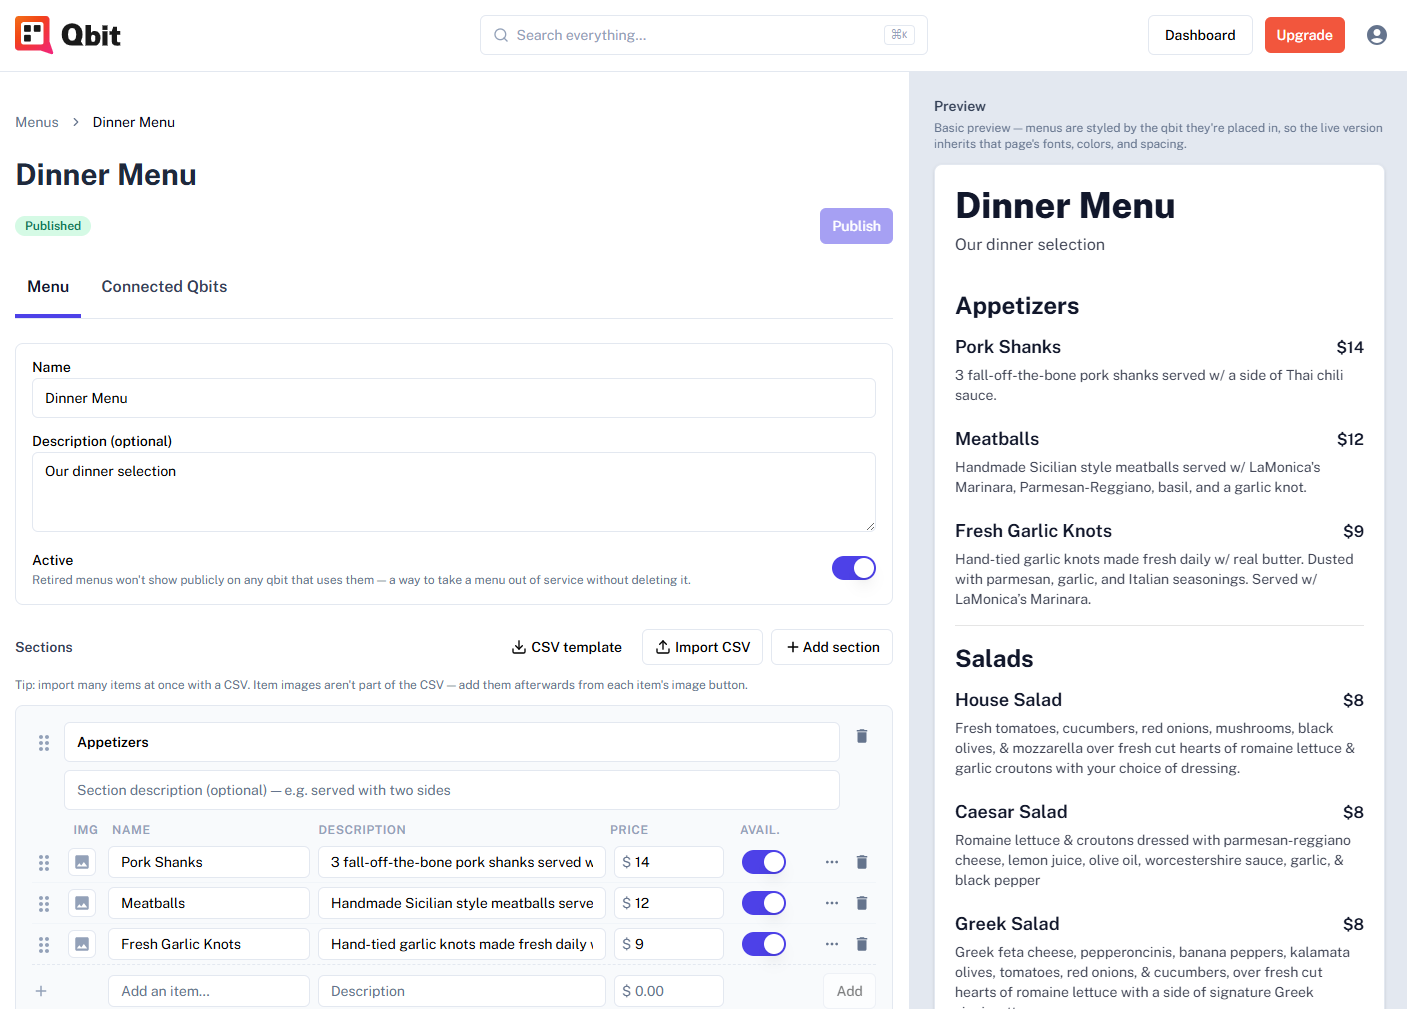
Create the menu
- Go to Menus and click New Menu.
- Name it (e.g. "Dinner Menu") and click Create - you land straight in the menu builder.
- Click Add section and name it ("Appetizers", "Mains"). Each section can carry an optional description like "served with two sides".
- Add items using the quick-add row at the bottom of each section: name, optional description, price - press Enter and type the next one. It's built for rattling through a whole menu fast.
- Drag sections and items to reorder them anytime.
The details that make it feel real
- Prices are flexible. Type a number and it displays with a dollar sign - or type "MP" or "Market Price" and it prints exactly that.
- Price variants handle sizes and options. Open an item's ⋯ menu → Price variants and add named prices - Glass / Bottle, Small / Medium / Large. Variants replace the single price on the menu.
- Item photos: click the image button on any row to add one from your media library.
- The availability switch on each row is your 86 button - flip it off and the item shows as sold out (or disappears entirely, your choice - set in the page's menu element).
Already have it in a spreadsheet?
Click CSV template in the builder for a ready-made file, fill it in (up to 500 rows), and hit Import CSV. Sections are created automatically from the Section column; variants use the format Small:14|Large:22. Photos aren't part of the CSV - add those per item afterward.
Publish it
Edits stay in a draft until you click Publish - so you can rework the menu mid-service without customers seeing it half-done. When it's ready, publish, then add it to a page.
Still stuck? Email support@qbit.codes.