Creating a QR code
Step-by-step through the QR code creation flow.
Creating a code takes about a minute, and every choice you make here can be changed later - including where it points.
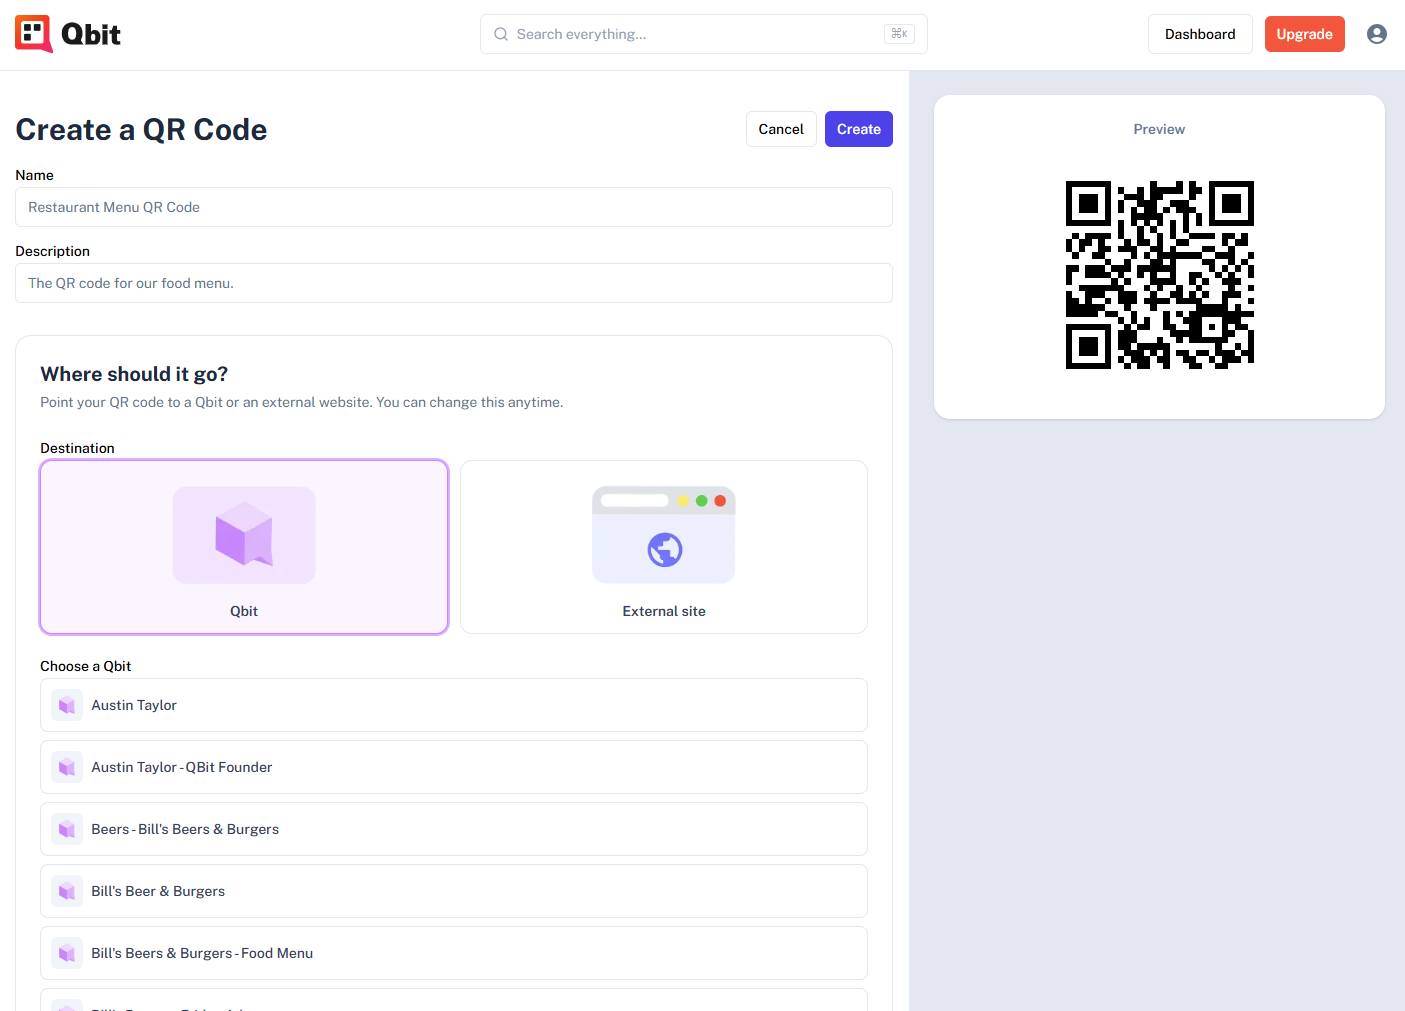
- In the portal, go to QR Codes and click Create a QR Code.
- Give the code a Name (e.g. "Restaurant Menu QR Code") and an optional Description. Names are for you; scanners never see them.
- Under Where should it go?, choose a destination:
- Qbit - a page you've built in Qbit. Pick it from the list.
- External site - any website. Paste the full URL, including
https://. - You can also skip this and connect a destination later.
- Under Design your QR code, style the code or start from a template. The live Preview on the right updates as you go - see Customizing your QR code's design.
- Optionally add Tags and UTM Parameters (both Premium) to keep codes organized and campaigns measurable.
- Click Create.
You'll land on the code's detail page, where you can copy its short scan link, download it, and manage everything about it.
A few things worth knowing:
- Every code gets a permanent short link (like
/qr/a1b2c3). That's what the pattern encodes - the destination is looked up at scan time, which is why it's editable forever. - The Test link on the detail page opens the destination without counting as a scan - use it freely.
- The Starter plan includes 3 QR codes; Premium raises that to 100, and Team has no limit.
Need many codes at once? See Bulk-creating QR codes.
Still stuck? Email support@qbit.codes.